This blog should be called "The Adventures of a Fabric Junkie!". I am passionate about fabric, threads, colours and textures. I can record my crazy quilting, sane quilting, embroidery and everything else that I consider important in my life.

Photo shows my block for the Hurricane Katrina fund-raising quilt "All That Jazz".

Wednesday, November 08, 2006

My BIGGEST UFO quilt

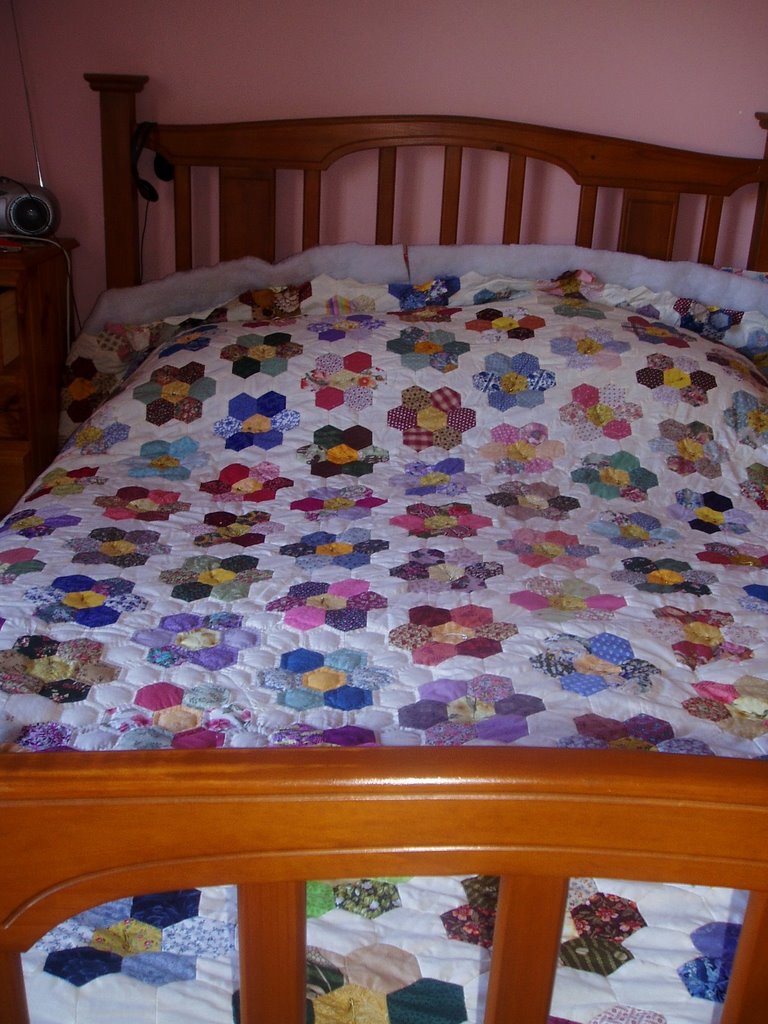
This would have to be the BIGGEST UFO imaginable. I started making the hexagons in 1995 while on a plane between Australia and England and took lots of cut-out paper templates and pre-cut fabric shapes with me to work on while on holidays. I made the mistake of measuring the quilt from the floor on one side of the queen sized bed, over the top and down the other side to get the width, then I measured from the floor at the end of the bed, up the length of the bed and over the pillows (in this photo, a lot of the quilt is tucked down below the camera out of sight), and over the pillows to get the length. Then I stitched enough hexagon flowers separated by calico hexagons to finish the whole of the outside edge, thus committing myself to this HUGE size. One momentous day about four years ago, I finally reached the middle and therefore last flower and my hands shook so much I could hardly sew. Each hexagon flower has a yellow patch in the centre surrounded by two dark, two medium and two light colour co-ordinated ones. Every hexagon was hand tacked to the paper then top-sewed with tiny slip-stitches to it's neighbours. There will not be one single machine stitch in this quilt but I have to admit that I have been procrastinating about the actual hand-quilting, even though the quilt, wadding and backing is all sandwiched together and held with quilter's safety pins. It is awkward to manipulate and hand-quilt because of the sheer weight of it all and also because I am using a large hoop to keep the fabric taut. This is my UFO to finsh next year in Sandie's UFO challenge. I intend to finish it off by sewing a wide border to the backing fabric, bringing it through to the front, tucking it under the last row of flowers and then using the applique method to stitch the flowers down on the border, making a straight edge. Posted by Picasa

Hexagon quilt UFO

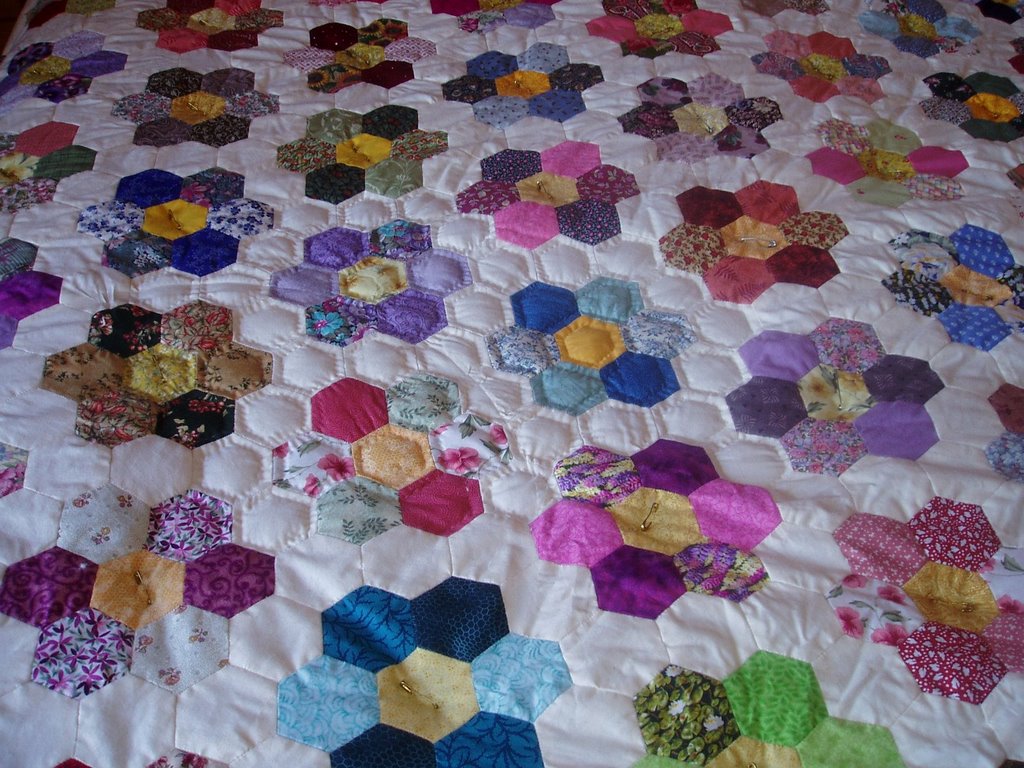
This is another view of the quilt from the side of the bed. This photo shows the small area where I have begun to hand quilt each hexagon. It's not particularly hard work, just awkward because of the large ring I am using to hold the quilt taut while I quilt. The quilt measures 11 feet x 10 feet in total with each hexagon measuring 2 1/2 inches across. Posted by Picasa
This is the meccano set which hopefully, one day.........sigh.........might become my studio. At the moment it just consists of the welded wall frames and roofing trusses, roofing metal sheets, weathertex slats for the sides, gutters and downpipes and a box of bits which bolt it all together. This all arrived three weeks ago but because the sliding door and two windows hadn't arrived, it wasn't possible to construct it. Well, three weeks later, the door and windows have still not arrived and if they are not here by Monday I am going to lodge an official complaint against the company with the Ministry of Fair Trading. It has been nearly six months since I signed the contract and all we have is a concrete slab covered in meccano bits. It's dragging on far too long now....... Posted by Picasa

Wednesday, October 18, 2006

Morning number one of our Holiday

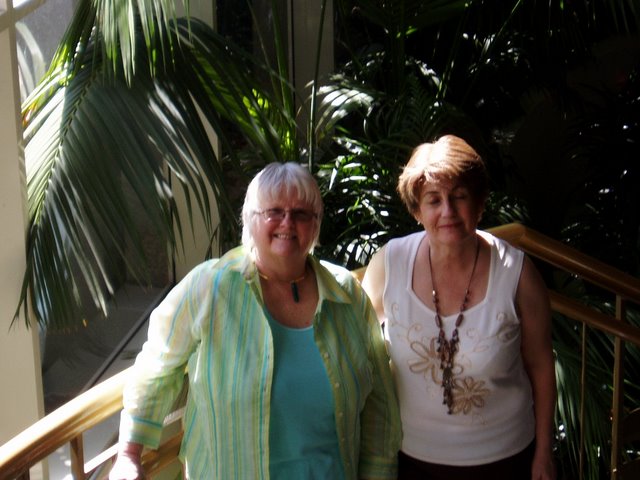
We conned the man at the Mercure Hotel in Rosehill, Sydney, to take our photo. He took so long fiddling with my camera that Mary went to sleep standing up - no, not really, she closed her eyes just as he finally clicked the camera. Unfortunately we didn't realise at the time so couldn't get him to take another one. Not to worry, we were about to start on two wonderful weeks together........ Posted by Picasa

My very first sight of a Waratah

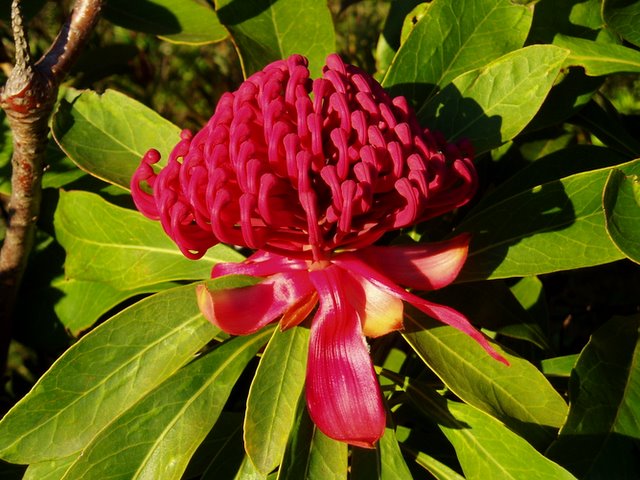
We don't have Waratahs in Western Australia so it was with great excitement that I spotted this bush growing across the road from the Three Sisters lookout in Katoomba. I always thought that the flowers would be hard and wiry but they are actually quite soft and more pinky-red than bright red. I am not used to taking photos of flowers so this was a real hit and miss attempt and for a change, it was a hit!! Posted by Picasa

Viv the tourist.....

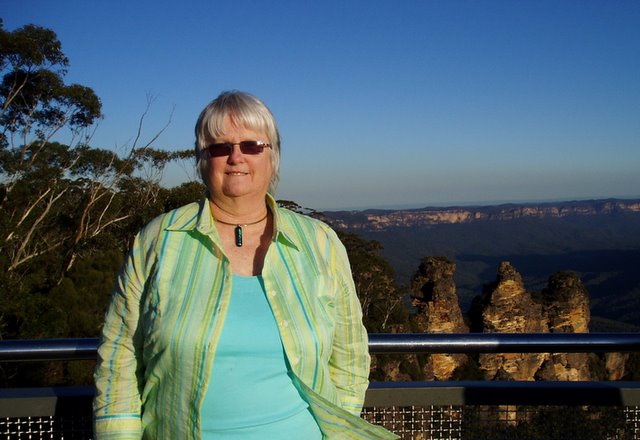
Mary picked me up from the airport and we spent the first night at the Mercure Hotel in Rosehill near Parramatta. It was fabulous as our twin share room had two DOUBLE beds in it. We shared the first of several nights of giggling and crying like silly school girls at a Brownie Camp!! The next morning we drove from Rosehill to Katoomba via every Op-shop on the way. Mary photographed me doing the tourist bit at the Three Sisters lookout at Katoomba where we stayed the second night at a Bed & Breakfast. I saw my very first Waratah in full bloom and took lots of photos of it........VERY touristy!! Posted by Picasa

Viv and Rick Rutherford

This was one of the highlights of my holiday - meeting my favourite magazine author, Rick Rutherford. Rick started out writing "Australian Country Collections", then moved on to writing "Rick Rutherford's Country". Now he is busy working on a web site and on-line shop which can be found at www.rickrutherford.com and he stocks all sorts of country items from quilts to wooden angels. Rick took Mary and me to a lovely little French cafe in Leura and treated us to coffee and tiny cakes. What started out as a serious conversation finished up in total hysteria as Rick and Mary both have the same wicked sense of humour. It was like the "Rick and Mary Show" for an audience of one, ie. me. I have to admit the laughter was getting a bit loud for such refined surroundings by the time we left. Posted by Picasa

Mary's Tatting Lesson.

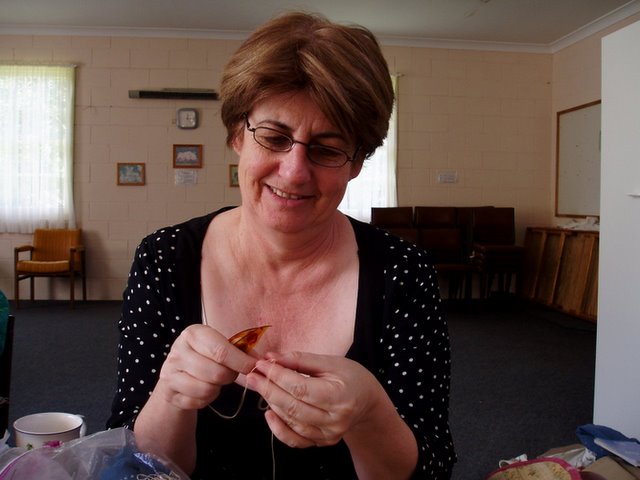
Mary learnt to tat last year at the Nowra CQ Retreat and she picked it up really quickly, however it still didn't stop her getting all tied up in knots at the Mollymook Embroiderer's Guild meeting! I was experimenting with tatting using two colours and managed to complete an inch of tatting before making a mistake and having to start again. I was happy with the result though - pink clovers joined with green chains. I will blog it once I get past the 1 inch mark....... Posted by Picasa

Mollymook Embroiderer's Guild Meeting

During the first week, Mary took me to her local embroidery group, the Mollymook branch of the NSW Embroiderer's Guild. It is held in the Uniting Church hall and on this particular week, the ladies were making that beautiful silk ribbon embroidered evening bag on the table in the foreground. The group was so friendly and made me feel right at home immediately...........come to think of it, I didn't see Mary's bag???? Posted by Picasa

Sharon Boggon and Annie Whitsed

We had a fabulous time in Canberra with the Canberra Crazies. Annie Whitsed very kindly offered us beds in her house which is a veritable museum of yummy collectibles and crazy quilting goodies. We were really impressed by her storage method for her beads, shallow trays with tiny vials of beads, all coloured coded of course! After a lovely lunch on Saturday provided by the Canberra Crazies, we went shopping at the Canberra Needlework Shop which is where I took this photo of Sharon and Annie. Saturday night was great with a meal at Mama's Trattoria in the Canberra CBD where me met Maria and Jos Vialle for the first time. Posted by Picasa

Mary and Peter

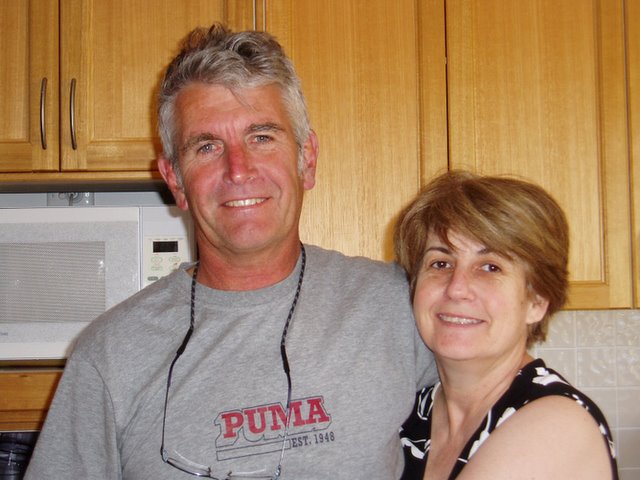
Well, here they are! Mary Lewis and her husband Peter Gilberd. They both absolutely spoilt me rotten for the whole fortnight - their home was my home and I hope that in a year or so they will be coming to Perth to spend some time with Eddie and me and we can spoil them in return. They have a beautiful home on three levels going down a steep hill and which has views across the trees to the ocean. It was so different to what I'm used to over here in Western Australia, even the birds were beautiful - Rainbow Lorrikeets which I'd never seen before either. Needless to say, I can hardly wait to go back Posted by Picasa

Sunday, September 17, 2006

Geisha Girl Bliss bag


Geisha Girl Bliss bag
Originally uploaded by Crazydolldresser.
This is probably my most favourite bliss bag I have put together yet. It features Edwardian actress, Miss Marie Studholme in a Geisha costume and the photo has been hand-coloured in a curious mixture of pale yellow, aqua blue and pink flowers with green leaves. I really enjoyed choosing fabrics and trims to match the colours in the photo even making pink, lemon and blue "skeins" of Ardern's Silkateen very vintage thread. I love working with vintage threads as they have a totally different effect to our modern ones. I am going to make myself a block using Miss Marie which I want to put in a frame which has a cardboard mount with a sort of bamboo/straw pattern in fawn colours. This will be my project to work on while I'm in Sydney with my friend Mary Lewis.

It's finally happening!


my studio 002
Originally uploaded by Crazydolldresser.
The bloke in charge of the concreting team thought I was a complete nutter, running around taking photos of the wooden formwork, the black plastic and the steel re-inforcing mesh on top. It looks so small in the photo but the studio will actually measure five metres (nearly sixteen feet) across by four metres (just over 13 feet) deep. I hope it is big enough to keep my stash, my cutting table, sewing machines and overlockers etc..... I really can't believe that after all this time of waiting, it is finally happening.

Men at work - on my studio.


my studio 005
Originally uploaded by Crazydolldresser.
I stood on the verge over the road to take this photo of the workmen's vehicles out the front of our house. I was standing in front of yet another truck with a bob-cat on the back while I photographed the cement mixer vehicle, a truck full of wheel barrows and shovels etc and one of the young "boys" car. As you can see, I live in suburbia, however we don't have houses across the road, we have grassy areas, a creek, then a railway line which carries freight trains and in the winter months we get the occasional preserved steam train and behind that, paddocks and the hills of the Darling Ranges..

My Concrete Slab.


my studio 008
Originally uploaded by Crazydolldresser.
Nearly four months after we signed the contract for the studio, I am now the proud owner of............a concete slab! Firstly, the local government authority took three months to approve the building permit then the company who are building the studio "lost" our folder of specifications and plans until I finally took a day of work and went into their office. I merely asked why, after nearly four months, do I not have a studio in my back yard??? Well, from 8.30am until 1pm, there was mad search for the folder which was finally located and within four days, I have a slab, but at least I can plan where things are going to go and best of all, I'll have my OWN place to sew, to cut, to pin and to dream.........this photo shows how the studio will be flush up against the brick paving and roof of the patio area.

Tuesday, July 04, 2006

Heavenly Embellishments


Heavenly Embellishments
Originally uploaded by Crazydolldresser.
We've arrived!! Mary Lewis and I have finally realised the beginning of our dream, Mary has put the website on the net and I've been busy making embellishment baggies or squishies, in crazy quilters' language. We hope to gradually build up our products to include laces, charms, dyes, Dyer's Delight packs of fabrics, trims and threads in creams and natural colours, silk ribbons and tiny bead containers. These tiny containers will be great to storing mixed dye colours as well. Mary and I can hardly wait for our little venture into the big wide world of business to take off........I'm just wondering how much time we'll have for crazy quilting ourselves???

Anyway, this is the contents of a sample Pastel Assortment pack which is colour co-ordinated to match the silk print. The larger Bliss bags will also contain 8 x 6 inch squares of matching fabrics - definitely no cottons either because we both want our bags to be pure quality and therefore they will only include embellishments that we would like to buy ourselves.

Heavenly Embellishments 003

Here is the contents of one of our smaller assortment bags. For some reason the scanner has "killed" off the silk print but not the trims, the little girl is actually brighter than she looks in the photo. We try to colour co-ordinate all the laces and trims to the colours and suggested era of the print. For instance, I wouldn't put these muted trims with a bright colourful photo but they are a perfect match for the flowers in the basket that the girl is holding. Every packet will have at least twenty items, some even more. These are really great value for people wanting to build up a stash of small pieces suitable for crazy quilting and fabric postcards.

Heavenly Embellishments 002

This is the contents of a sample "Classic Collection" bag. A total assortment of all things old, vintage, antique....nothing newer than fifty years ago and some things dating back to the mid 1880s. This pack is perfect for someone working on a traditional cream on cream block or an heirloom crazy quilt block and some will even contain a vintage un-used iron on transfer from my collection. This pack also contains some very old original diamantes from the 1920s and a piece of handsewn broderie anglaise made by a young pieceworker over 100 years ago.

Saturday, June 17, 2006

Hat Pin cushion with half doll

Here is a photo taken of my lady out in the sun so her details show up better. It took me an hour last night in front of TV to make the six bead hat pins. The best part was spending time in the bead shop choosing beads to compliment the ones that came with the kit. Tonight I thought I would cover a wooden coathanger with wadding and cream satin, then cream lace, wind cream silk ribbon around the handle and trim it with the large silk rose and 2 leaves. Another heirloom for 2 hours play???

Half doll hat-pin cushion

Just to prove that I haven't been idle while DH has been digging, I received a kit for a "hat pin poof" from Flights of Fancy Boutique which consisted of a 16 circle of crinkled fabric, a large silk rose and two silk leaves, 2 long hat pins and a bag of assorted beads with which to create the hat pins themselves. I started by gathering the circle of fabric during my lunch hour and stuffing it at home that night. I played around with the flower, added some more flowers of my own but still wasn't happy with it. I draped the cheap cotton crocheted lace collar over what was now an 8 inch cushion and voila! A skirt! I had the repro half doll so put her in the middle of the cushion and gathered it up tight, threaded some silk ribbon through the top of the collar and I have a beautiful authentic looking hat pin doll. The whole thing took about an hour and a half to complete.

My studio 011


My studio 011
Originally uploaded by Crazydolldresser.
I just had to include this on my blog. I took a photo of DH digging when he stood up and asked "Are you taking a photo of me?" and while he was talking, I took one. The Lemon, Mandarin and Grapefruit trees have been moved to the other end of the yard and so far, none show signs of rejecting their new home. Thankfully we haven't had any rain yet or the house would be full of that sand, sand and more sand.

My studio 012


My studio 012
Originally uploaded by Crazydolldresser.
This is the same area of ground looking towards the back fence. Fortunately the studio has got to be 900cm from both the back and side fences so the lovely Orange Trumpet Vine creeper from the garden at the back can stay. My husband is going to brick pave the 900cm areas around the studio so that it can be kept clear of junk.....what's to bet that junk will appear in the newly created 'storage area' very quickly??? The studio will run five metres along the back fence and come forward 4 metres to meet up with the brick paving in the foreground.

My studio 008


My studio 008
Originally uploaded by Crazydolldresser.
Here's an update on my studio. All the plants and pots have been removed from the corner of the yard and DH is busy levelling off the soil ready for the concrete slab.

Monday, June 05, 2006

Christening Gown 001


Christening Gown 001
Originally uploaded by Crazydolldresser.
Photo of my mother-in-law's christening gown made by her grandmother in 1910. The doll in the cabinet next to it is dressed in a dress and petticoat made entirely by hand using very vintage pieces of cotton broderie anglaise material, some of which is hand-embroidered. It seemed a shame to have it all in bits in a drawer so I dressed her in a circa 1910 outfit so I could display the fabric.

Christening Gown 002


Christening Gown 002
Originally uploaded by Crazydolldresser.
Close-up photo of the yoke of the christening gown. I must apologise for the little 1960s nudey-rudey to the left of the photo......I will make her a dress, soon!

Sunday, June 04, 2006

My bag 003


My bag 003
Originally uploaded by Crazydolldresser.
Here is a close-up photo of the front of the bag showing a beaded hand-dyed butterfly motif which was one of first attempts at "painting" the dye onto lace. Sandie gave me some hand-dyed ribbon which I put to good use and she also gave me the little tatted motif and mauve flower at the top, while Mary Lewis sent me the glittery ruffled ribbon in the front. I printed the lady out onto cotton and embellished her, the pansy and diamond shaped motifs were received in swaps and my pride and joy - that mottled piece of fabric at the bottom - silk crepe which I dyed at a dye course I did several years ago. I enjoyed working on the crazy quilting part but I get impatient when it is time to actually put the thing together.

My bag 001


My bag 001
Originally uploaded by Crazydolldresser.
This is the tote bag I finished today (well, I've still got a little bit of handsewing on the inside to to). I bought the raggy fringe from Flights of Fancy boutique in USA then had to choose colours to match. The fringe was a sludgy purple/cerise pink/olive/turquoise/old gold blend so was quite difficult. I put a plain fabric back on it with matching lining. The handles are from my usual source! Charity shops!!!!

Thursday, June 01, 2006

My studio 001


My studio 001
Originally uploaded by Crazydolldresser.
Well, this would have to be the best thing that has happened to me in a lifetime! Eddie and I paid a deposit on a studio for me to be built in the back yard. It will measure 5 metres across by 4 metres deep and will be insulated on the walls and ceiling because of our high summer temperatures. A split-system air conditioner and heater will be on one wall and a large window in the other. This is the corner of the garden which will have to go, as you can see, not much there anyway.......shame about the lemon tree! Eddie has decided to clear the fences of creepers and paint them all green with terracotta capping before the studio goes in. The front of it will line up with the brick paving of the patio in the foreground, the brick paving where the garden lounge is will go, the back of the studio will be the back fence and it will go about as far again to the left of the photo. I am a very happy little Vegemite at the moment!

op shop finds 001


op shop finds 001
Originally uploaded by Crazydolldresser.
It was a beautiful autumn day, so my husband Eddie and I both took the day off work and drove to a country town east of Perth called Toodyay. We wandered around the main street, had a lovely meal in one of the local pubs and I went shopping in St Vincent de Paul's charity shop. These were the best op shop finds I have discovered in a long time. I paid just $10 for both tops, the red one has swirls of red pearls in three sizes with other swirls of red glass beads and the yellow linen blouse has rayon lace around the sleeves and collar, a different wider rayon lace around the top of the sleeves at the shoulders and four rayon lace rose motifs on the fronts. I think the blouse must have been made up white and then dyed because everything is exactly the same shade of yellow.

cq storage 003


cq storage 003
Originally uploaded by Crazydolldresser.
On one of the crazy quilting on-line groups I am in, we were discussing storage systems for our crazy quilting fabrics. Here's my method - simple clear plastic containers holding 6 inch squares of fabric sorted by colour. My beads are are in clear containers with divided sections - also sorted by colour. I find it helpful to always cut my material up into 6 inch squares straight away so I don't finish up with a pile of second hand clothes, yardage fabrics and odd shaped pieces.

SRE flowers 001


SRE flowers 001
Originally uploaded by Crazydolldresser.
Dianne gave me some left-over coppery coloured knitting yarn so I thought I would include it on her bag somewhere. It was a coarse, scratchy metallic braid and I tried just stitching it along a seam which didn't work so I worked some basic silk ribbon embroidered flowers along a seam. To my surprise it worked really well and apart from having to use a needle with a very large eye and having to really tug it through the seam, it wasn't hard to sew. The end result is some very satisfactory daisies which added sparkle and glitz to the crazy quilting.

Back of Dianne's bag


Back of Dianne's bag
Originally uploaded by Crazydolldresser.
This is the other side of Dianne's bag. I added buttons and needle-turned and slip-stitched a vintage applique along the long seam near the top. The bag was lined with a dull orange self-patterned cotton quilting fabric.

Front of Dianne's bag


Front of Dianne's bag
Originally uploaded by Crazydolldresser.
The barter system is alive and well at my place! A work colleague, Dianne, knitted me a winter scarf and hat, a summer weight dressy scarf and finished off a woollen cardigan I started knitting in 1995 and never finished. In return, I made her this cq bag. The photo makes it look uneven, but believe me, it was perfectly balanced in real life! Dianne wears a lot of browns and autumn colours so it seemed a good choice of colour for her bag as well....and because some of the variegated velvet had a bit of dull turquoisey blue in it, I was able to add the very vintage velvet flowers and leaves at the top. This is the first side I did, although the bag doesn't really have a front or a back.

Maureen Bonds Christmas tree 003

Solvy DYB RR. Maureen Bond made a large picture for us all to embellish. It was a room with walls, floor, fireplace and of course, a Christmas tree. I chose to make a wreath for the wall which was a green pipe cleaner wrapped in funky fibre and a sort of green holographic tinsel with red beads sewn on. The clock was a piece of dark brown fabric appliqued onto the mantlepiece with a button clock face. Mary Lewis had already added the candles around the Christmas tree and Anne had put the star of the top and the button stockings on a gold cord. I hope Anne doesn't mind but I put her stocking buttons on the fire place and decorated the tree with gold cord and lots of tiny charms and bead ornaments. This was great fun and I thoroughly enjoyed it.

margaret's block


margaret's block
Originally uploaded by Crazydolldresser.
Firstly, the Solvy DBY RR. After I finished Mary Lewis's cream on cream block, I received this bright orange, yellow and green block from Margaret Price. Wow, this block was so challenging because these are not the sort of colours that I normally work with, however I really enjoyed myself experimenting with 3D flowers and charms. The appliqued butterfly introduced brown colour to the block so I was able to balance it up with the dyed lace and the stitchery along the sides of the sheer braid with vinyl orange flowers. The flowers around the little gold "My Garden" charm were single tatted flowers which I worked in white thread and then dyed orange and yellow.

I'm back blogging

It's been nearly three months since I actually sat down and blogged. Life and work have taken up so much of my time and inclination that I have ignored my blog to the point that many of my friends are asking me when I'm going to add something. I'd feel guilty leaving it any longer. Obviously they've taken a look and found nothing new.......sorry everyone, I'll try not to leave it so long again. Anyway, I'll try and work out what's been happening since March and include as much as I can think of.

Sunday, March 05, 2006

Complete Solvy DYB block


Complete Solvy DYB block
Originally uploaded by Crazydolldresser.
This photo is of the complete cream-on-cream block for Mary Lewis. Apart from the fan, linen circle with tatting and the sea-horse, there are some tiny flat copper rings covered in buttonhole stitch, embroidered lace, vintage pearl buttons and more.

Seahorse corner

This little cream lace seahorse just cried out for a sea bed to sit on. I stitched various types of seaweed in different types and textures of thread and added the tiny gold shell and starfish charms. There are a lot of irridescent bead "bubbles" rising in lines to the surface of the ocean but unfortunatly they haven't shown up in the photo.

Close-up of tatting and hem-stitched linen

I bought several sheets of these little hem-stitched shapes on eBay a couple of years ago. The circles measure 1 3/4 inches across and are meant to be used as centres of crocheted motifs. They date from around 1900. I slip-stitched some vintage tatted edging around the edge of the circle and added ribbon roses and rayon thread bullion leaves plus the little gold blue bird charm.

Method of making Solvy Fan

Here is a practice piece I did on some scrap material first. I wanted the fan to be controlled rather than just a pile of clipped thread pieces trapped between the two layers of solvy. I sewed the outline shape then filled it in with a rough grid of straight sewing lines. After a few experimental machine embroidery stitches, I finished up deciding on the top embroidery stitch which is a double zig-zag stitch, then machine stitched back and forth across the fan following the curves and making sure that each row went over the edge of the previous row. Once the fan shape was covered, I sewed an edging around all sides of the fan with the same stitch.

Solvy Fan


Solvy Fan
Originally uploaded by Crazydolldresser.
This is the fan I made for Mary's DYB block using solvy. I appliqued the fan shape onto the background over the top of a tiny organza frill then added silk embroidered bullion roses, ribbon, wrapped thread spokes and a satin stitched bow.