This blog should be called "The Adventures of a Fabric Junkie!". I am passionate about fabric, threads, colours and textures. I can record my crazy quilting, sane quilting, embroidery and everything else that I consider important in my life.

Photo shows my block for the Hurricane Katrina fund-raising quilt "All That Jazz".

Wednesday, October 18, 2006

Mary's Tatting Lesson.

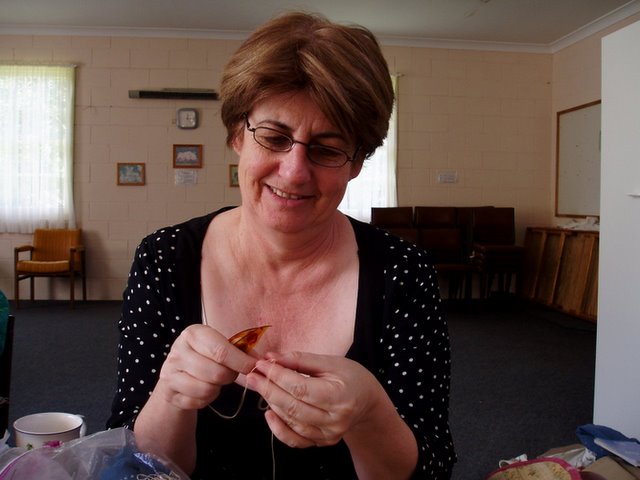
Mary learnt to tat last year at the Nowra CQ Retreat and she picked it up really quickly, however it still didn't stop her getting all tied up in knots at the Mollymook Embroiderer's Guild meeting! I was experimenting with tatting using two colours and managed to complete an inch of tatting before making a mistake and having to start again. I was happy with the result though - pink clovers joined with green chains. I will blog it once I get past the 1 inch mark....... Posted by Picasa

Mollymook Embroiderer's Guild Meeting

During the first week, Mary took me to her local embroidery group, the Mollymook branch of the NSW Embroiderer's Guild. It is held in the Uniting Church hall and on this particular week, the ladies were making that beautiful silk ribbon embroidered evening bag on the table in the foreground. The group was so friendly and made me feel right at home immediately...........come to think of it, I didn't see Mary's bag???? Posted by Picasa

Sharon Boggon and Annie Whitsed

We had a fabulous time in Canberra with the Canberra Crazies. Annie Whitsed very kindly offered us beds in her house which is a veritable museum of yummy collectibles and crazy quilting goodies. We were really impressed by her storage method for her beads, shallow trays with tiny vials of beads, all coloured coded of course! After a lovely lunch on Saturday provided by the Canberra Crazies, we went shopping at the Canberra Needlework Shop which is where I took this photo of Sharon and Annie. Saturday night was great with a meal at Mama's Trattoria in the Canberra CBD where me met Maria and Jos Vialle for the first time. Posted by Picasa

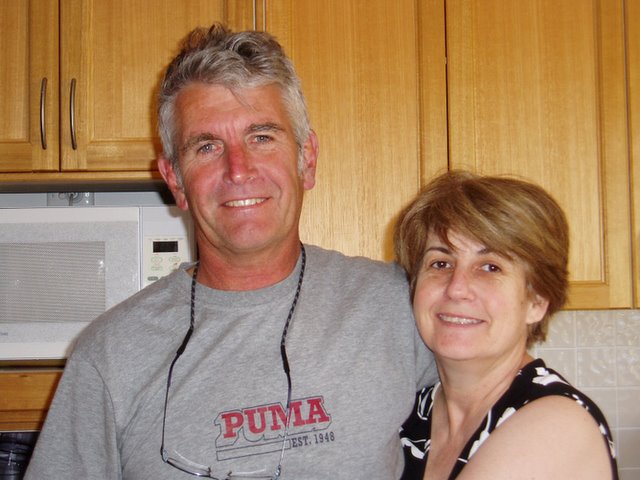
Mary and Peter

Well, here they are! Mary Lewis and her husband Peter Gilberd. They both absolutely spoilt me rotten for the whole fortnight - their home was my home and I hope that in a year or so they will be coming to Perth to spend some time with Eddie and me and we can spoil them in return. They have a beautiful home on three levels going down a steep hill and which has views across the trees to the ocean. It was so different to what I'm used to over here in Western Australia, even the birds were beautiful - Rainbow Lorrikeets which I'd never seen before either. Needless to say, I can hardly wait to go back Posted by Picasa

Sunday, September 17, 2006

Geisha Girl Bliss bag


Geisha Girl Bliss bag
Originally uploaded by Crazydolldresser.
This is probably my most favourite bliss bag I have put together yet. It features Edwardian actress, Miss Marie Studholme in a Geisha costume and the photo has been hand-coloured in a curious mixture of pale yellow, aqua blue and pink flowers with green leaves. I really enjoyed choosing fabrics and trims to match the colours in the photo even making pink, lemon and blue "skeins" of Ardern's Silkateen very vintage thread. I love working with vintage threads as they have a totally different effect to our modern ones. I am going to make myself a block using Miss Marie which I want to put in a frame which has a cardboard mount with a sort of bamboo/straw pattern in fawn colours. This will be my project to work on while I'm in Sydney with my friend Mary Lewis.

It's finally happening!


my studio 002
Originally uploaded by Crazydolldresser.
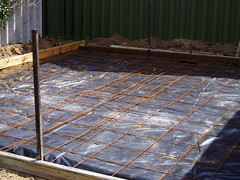
The bloke in charge of the concreting team thought I was a complete nutter, running around taking photos of the wooden formwork, the black plastic and the steel re-inforcing mesh on top. It looks so small in the photo but the studio will actually measure five metres (nearly sixteen feet) across by four metres (just over 13 feet) deep. I hope it is big enough to keep my stash, my cutting table, sewing machines and overlockers etc..... I really can't believe that after all this time of waiting, it is finally happening.

Men at work - on my studio.


my studio 005
Originally uploaded by Crazydolldresser.
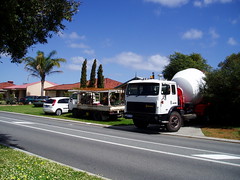
I stood on the verge over the road to take this photo of the workmen's vehicles out the front of our house. I was standing in front of yet another truck with a bob-cat on the back while I photographed the cement mixer vehicle, a truck full of wheel barrows and shovels etc and one of the young "boys" car. As you can see, I live in suburbia, however we don't have houses across the road, we have grassy areas, a creek, then a railway line which carries freight trains and in the winter months we get the occasional preserved steam train and behind that, paddocks and the hills of the Darling Ranges..

My Concrete Slab.


my studio 008
Originally uploaded by Crazydolldresser.
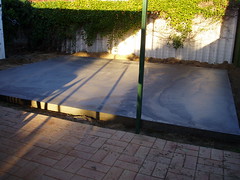
Nearly four months after we signed the contract for the studio, I am now the proud owner of............a concete slab! Firstly, the local government authority took three months to approve the building permit then the company who are building the studio "lost" our folder of specifications and plans until I finally took a day of work and went into their office. I merely asked why, after nearly four months, do I not have a studio in my back yard??? Well, from 8.30am until 1pm, there was mad search for the folder which was finally located and within four days, I have a slab, but at least I can plan where things are going to go and best of all, I'll have my OWN place to sew, to cut, to pin and to dream.........this photo shows how the studio will be flush up against the brick paving and roof of the patio area.

Tuesday, July 04, 2006

Heavenly Embellishments


Heavenly Embellishments
Originally uploaded by Crazydolldresser.
We've arrived!! Mary Lewis and I have finally realised the beginning of our dream, Mary has put the website on the net and I've been busy making embellishment baggies or squishies, in crazy quilters' language. We hope to gradually build up our products to include laces, charms, dyes, Dyer's Delight packs of fabrics, trims and threads in creams and natural colours, silk ribbons and tiny bead containers. These tiny containers will be great to storing mixed dye colours as well. Mary and I can hardly wait for our little venture into the big wide world of business to take off........I'm just wondering how much time we'll have for crazy quilting ourselves???

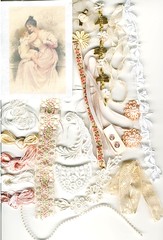
Anyway, this is the contents of a sample Pastel Assortment pack which is colour co-ordinated to match the silk print. The larger Bliss bags will also contain 8 x 6 inch squares of matching fabrics - definitely no cottons either because we both want our bags to be pure quality and therefore they will only include embellishments that we would like to buy ourselves.
Heavenly Embellishments 003

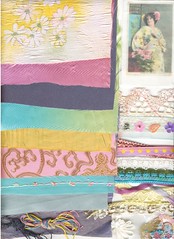
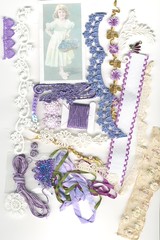
Here is the contents of one of our smaller assortment bags. For some reason the scanner has "killed" off the silk print but not the trims, the little girl is actually brighter than she looks in the photo. We try to colour co-ordinate all the laces and trims to the colours and suggested era of the print. For instance, I wouldn't put these muted trims with a bright colourful photo but they are a perfect match for the flowers in the basket that the girl is holding. Every packet will have at least twenty items, some even more. These are really great value for people wanting to build up a stash of small pieces suitable for crazy quilting and fabric postcards.

Heavenly Embellishments 002

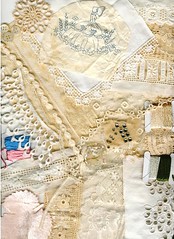
This is the contents of a sample "Classic Collection" bag. A total assortment of all things old, vintage, antique....nothing newer than fifty years ago and some things dating back to the mid 1880s. This pack is perfect for someone working on a traditional cream on cream block or an heirloom crazy quilt block and some will even contain a vintage un-used iron on transfer from my collection. This pack also contains some very old original diamantes from the 1920s and a piece of handsewn broderie anglaise made by a young pieceworker over 100 years ago.

Saturday, June 17, 2006

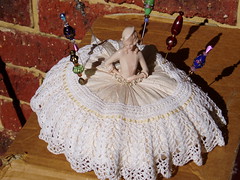
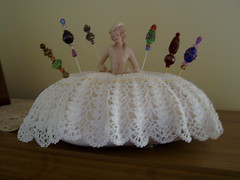
Hat Pin cushion with half doll

Here is a photo taken of my lady out in the sun so her details show up better. It took me an hour last night in front of TV to make the six bead hat pins. The best part was spending time in the bead shop choosing beads to compliment the ones that came with the kit. Tonight I thought I would cover a wooden coathanger with wadding and cream satin, then cream lace, wind cream silk ribbon around the handle and trim it with the large silk rose and 2 leaves. Another heirloom for 2 hours play???

Half doll hat-pin cushion

Just to prove that I haven't been idle while DH has been digging, I received a kit for a "hat pin poof" from Flights of Fancy Boutique which consisted of a 16 circle of crinkled fabric, a large silk rose and two silk leaves, 2 long hat pins and a bag of assorted beads with which to create the hat pins themselves. I started by gathering the circle of fabric during my lunch hour and stuffing it at home that night. I played around with the flower, added some more flowers of my own but still wasn't happy with it. I draped the cheap cotton crocheted lace collar over what was now an 8 inch cushion and voila! A skirt! I had the repro half doll so put her in the middle of the cushion and gathered it up tight, threaded some silk ribbon through the top of the collar and I have a beautiful authentic looking hat pin doll. The whole thing took about an hour and a half to complete.

My studio 011


My studio 011
Originally uploaded by Crazydolldresser.
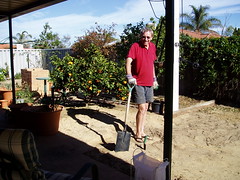
I just had to include this on my blog. I took a photo of DH digging when he stood up and asked "Are you taking a photo of me?" and while he was talking, I took one. The Lemon, Mandarin and Grapefruit trees have been moved to the other end of the yard and so far, none show signs of rejecting their new home. Thankfully we haven't had any rain yet or the house would be full of that sand, sand and more sand.

My studio 012


My studio 012
Originally uploaded by Crazydolldresser.
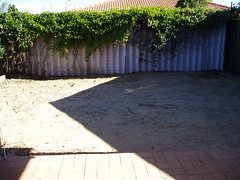
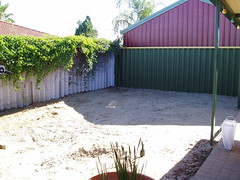
This is the same area of ground looking towards the back fence. Fortunately the studio has got to be 900cm from both the back and side fences so the lovely Orange Trumpet Vine creeper from the garden at the back can stay. My husband is going to brick pave the 900cm areas around the studio so that it can be kept clear of junk.....what's to bet that junk will appear in the newly created 'storage area' very quickly??? The studio will run five metres along the back fence and come forward 4 metres to meet up with the brick paving in the foreground.

My studio 008


My studio 008
Originally uploaded by Crazydolldresser.
Here's an update on my studio. All the plants and pots have been removed from the corner of the yard and DH is busy levelling off the soil ready for the concrete slab.

Monday, June 05, 2006

Christening Gown 001


Christening Gown 001
Originally uploaded by Crazydolldresser.
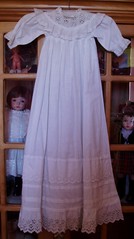
Photo of my mother-in-law's christening gown made by her grandmother in 1910. The doll in the cabinet next to it is dressed in a dress and petticoat made entirely by hand using very vintage pieces of cotton broderie anglaise material, some of which is hand-embroidered. It seemed a shame to have it all in bits in a drawer so I dressed her in a circa 1910 outfit so I could display the fabric.

Christening Gown 002


Christening Gown 002
Originally uploaded by Crazydolldresser.
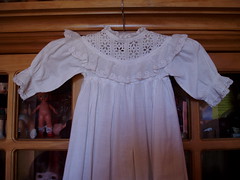
Close-up photo of the yoke of the christening gown. I must apologise for the little 1960s nudey-rudey to the left of the photo......I will make her a dress, soon!

Sunday, June 04, 2006

My bag 003


My bag 003
Originally uploaded by Crazydolldresser.
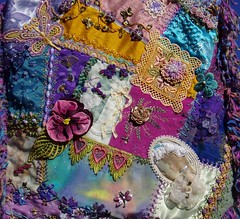
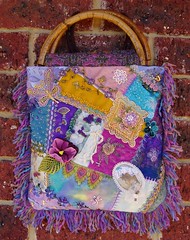
Here is a close-up photo of the front of the bag showing a beaded hand-dyed butterfly motif which was one of first attempts at "painting" the dye onto lace. Sandie gave me some hand-dyed ribbon which I put to good use and she also gave me the little tatted motif and mauve flower at the top, while Mary Lewis sent me the glittery ruffled ribbon in the front. I printed the lady out onto cotton and embellished her, the pansy and diamond shaped motifs were received in swaps and my pride and joy - that mottled piece of fabric at the bottom - silk crepe which I dyed at a dye course I did several years ago. I enjoyed working on the crazy quilting part but I get impatient when it is time to actually put the thing together.

My bag 001


My bag 001
Originally uploaded by Crazydolldresser.
This is the tote bag I finished today (well, I've still got a little bit of handsewing on the inside to to). I bought the raggy fringe from Flights of Fancy boutique in USA then had to choose colours to match. The fringe was a sludgy purple/cerise pink/olive/turquoise/old gold blend so was quite difficult. I put a plain fabric back on it with matching lining. The handles are from my usual source! Charity shops!!!!